Pediatric CPR for Parents: A Step-by-Step Guide to Infant & Child CPR
· 8 min read · David Onori
Knowing what to do when a child or infant is unresponsive and not breathing can make an overwhelming situation more manageable. Pediatric CPR is not exactly the same as adult CPR. Children and infants have smaller airways, smaller chests, and different compression techniques. In many pediatric emergencies, breathing problems happen before the heart stops, which makes rescue breaths especially important.
This guide provides an educational overview of pediatric CPR for parents in San Diego, caregivers, teachers, and community members. It is not a substitute for hands-on instruction. If an emergency occurs, call 911, follow the dispatcher's directions, and begin CPR if the child is unresponsive and not breathing normally or is only gasping.
Why pediatric CPR skills differ from adult CPR
Pediatric CPR uses the same basic cycle — chest compressions followed by rescue breaths — but the technique must be adapted to the child's size and age.
Key differences include:
- Infants: Birth to approximately 1 year old
- Children: Approximately 1 year old through puberty
- Compression depth: About one-third the depth of the chest
- Compression technique: Two fingers, one hand, or two hands depending on the child's size and the rescuer's position
- Airway position: An infant's head should remain in a neutral position, while a child's head may require a slight head tilt
- Rescue breaths: The rescuer must use a smaller amount of air for a small child or infant
Pediatric-focused programs from organizations such as the American Red Cross and HSI are designed to help parents, childcare providers, teachers, and other responders practice these differences.
Step 1: Make sure the scene is safe
Before approaching the child or infant, quickly check for hazards such as traffic, fire, electrical wires, water, or unsafe equipment. If the scene is dangerous, move away from the hazard and call 911.
If it is safe:
- Approach the child or infant.
- Check for responsiveness.
- Shout for help.
- Ask someone nearby to call 911 and get an AED, if available.
For a child, tap the shoulder and shout. For an infant, tap the bottom of the foot and speak loudly. Check for responsiveness and breathing for no more than 10 seconds.
If the child or infant is unresponsive and is not breathing normally, or is only gasping, start CPR.
Step 2: Call 911 and get an AED
If another person is present, direct them clearly:
“Call 911, tell them a child is not breathing, and bring the AED.”
If you are alone with a phone, call 911 immediately and put the phone on speaker so you can begin CPR while following the dispatcher's instructions.
If you are alone without a phone, perform approximately two minutes of CPR — about five cycles of 30 compressions and two breaths — before briefly leaving to call 911 and get an AED.
Do not delay CPR while searching for gloves or other supplies. If a barrier device is immediately available, use it according to your training. Otherwise, compression-only CPR is better than doing nothing if you are unable or unwilling to provide rescue breaths.
Step 3: Position the child or infant
Place the child or infant on their back on a firm, flat surface. A bed or couch is usually too soft for effective compressions.
Kneel beside the child or infant. Try to keep your shoulders positioned over the chest so you can deliver steady compressions without unnecessary interruptions.
Step 4: Give chest compressions
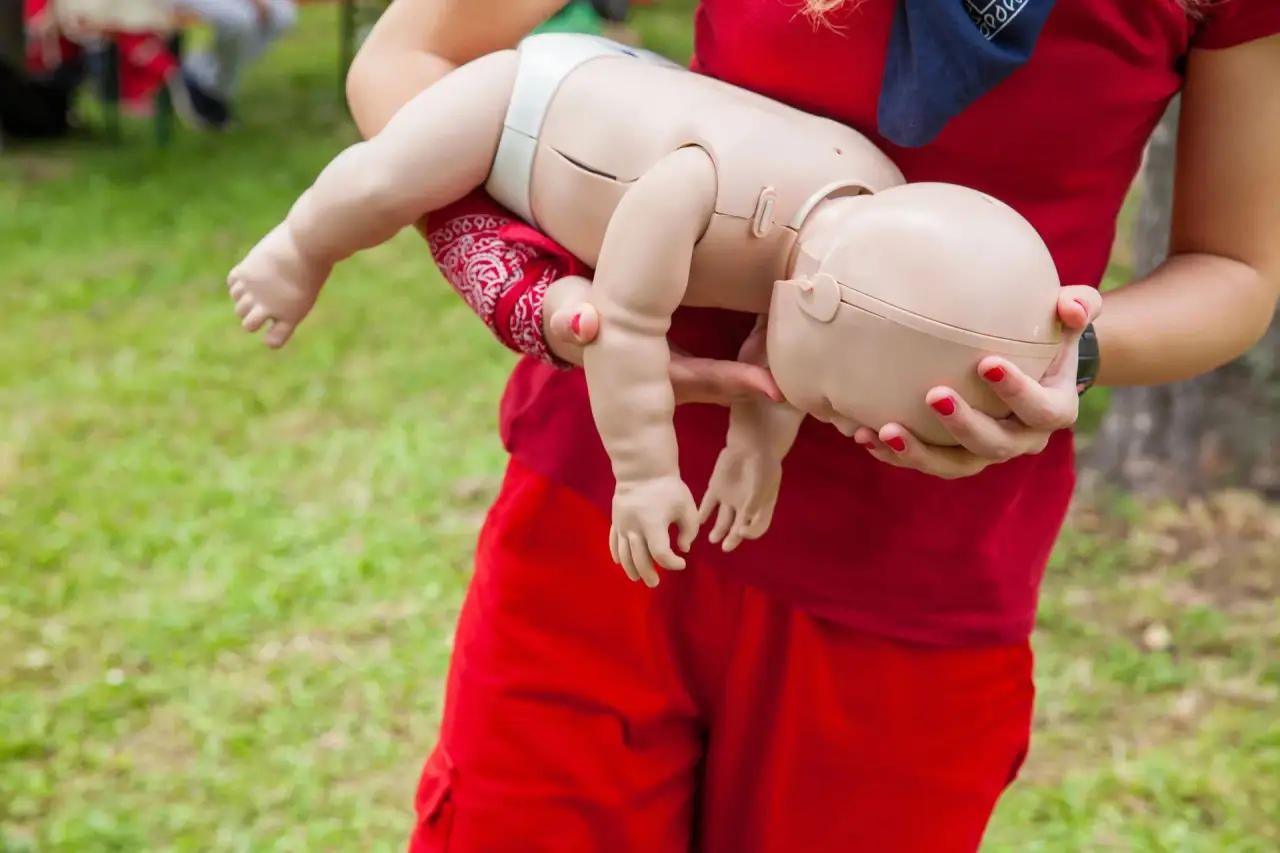
Infant CPR
For an infant, place your fingers in the center of the chest on the breastbone, just below the nipple line. Use the infant technique taught in your Red Cross or HSI course. Depending on whether you are working alone or with another responder, this may involve two fingers or the two-thumb encircling technique.
Compress the chest:
- About 1½ inches deep, or one-third the depth of the chest
- At a rate of 100 to 120 compressions per minute
- Allowing the chest to return fully after each compression
- Keeping pauses as short as possible
Use enough pressure to create effective compressions, but avoid leaning on the chest between compressions.
Child CPR
For a child, place the heel of one hand in the center of the chest, on the lower half of the breastbone. For a larger child, use two hands, one on top of the other.
Compress the chest:
- About 2 inches deep, or one-third the depth of the chest
- At a rate of 100 to 120 compressions per minute
- With your shoulders directly above your hands
- Allowing the chest to fully recoil after every compression
For a smaller child, one hand may be enough to reach the proper depth. Use the technique that allows you to provide effective compressions without using excessive force.
Step 5: Give two rescue breaths
After 30 compressions, open the airway and provide two breaths.
Rescue breaths for an infant
An infant has a very small airway, so rescue breaths should be gentle.
- Place one hand on the infant's forehead and use a finger to lift the chin.
- Keep the head in a neutral position rather than tilting it far backward.
- Seal your mouth over the infant's mouth and nose.
- Give a gentle breath for approximately one second.
- Watch for the chest to rise.
- Allow the air to leave, then give a second breath.
Use only enough air to make the chest visibly rise. Think of small, controlled puffs rather than a large breath.
Rescue breaths for a child
For a child:
- Use the head-tilt/chin-lift technique to open the airway.
- Pinch the child's nose closed.
- Seal your mouth over the child's mouth.
- Give a breath for approximately one second.
- Watch for the chest to rise.
- Give a second breath after the chest falls.
If the chest does not rise, reposition the head and try again. Avoid repeatedly blowing hard or quickly, because excessive air can enter the stomach and make ventilation more difficult.
Understanding the compression-to-breath ratios
The ratio depends on the number of rescuers:
| Situation | Compression-to-breath ratio |
|---|---|
| One rescuer for an infant or child | 30 compressions to 2 breaths |
| Two rescuers for an infant or child | 15 compressions to 2 breaths |
When two trained rescuers are available, one person can perform compressions while the other provides breaths and monitors the child. Change roles when needed to reduce fatigue, while keeping interruptions as brief as possible.
Continue CPR until help takes over
Continue cycles of compressions and breaths until:
- The child or infant begins breathing normally, moving, coughing, or showing another obvious sign of life
- An AED is ready to use
- Emergency medical professionals arrive and take over
- Another trained responder relieves you
- You become too tired to continue
- The scene becomes unsafe
If an AED is available, turn it on and follow the device's voice prompts. Use pediatric pads when available and appropriate for the child's age or size. If pediatric pads are not available, follow the AED's instructions or the 911 dispatcher's guidance.
Why hands-on pediatric CPR training matters
Reading CPR steps can help you understand the process, but an emergency is physical and fast-moving. Hands-on training gives you the opportunity to practice:
- Finding the correct compression location
- Using the right depth and rate
- Adjusting your technique for infants and children
- Giving gentle rescue breaths
- Opening a small airway correctly
- Working with a second responder
- Using an AED
- Responding while managing stress and uncertainty
A pediatric First Aid & CPR/AED class can also cover choking, allergic reactions, bleeding, burns, seizures, and other emergencies that parents and caregivers may encounter.
For families, schools, daycare centers, fitness facilities, and organizations, I provide professional, hands-on and blended training designed for real-world readiness. As a mobile instructor, I come to your location — your home, workplace, school, or community space — so your group can learn together without traveling to a training center.
Pediatric CPR training throughout San Diego County and nearby communities
I serve clients throughout San Diego County, Temecula, Murrieta, Menifee, and Lake Elsinore. As the sole instructor at Code Blue Safety Skills, I personally lead every class — whether it is a single parent, a childcare team, a school staff, or a workplace group.
If you are interested in a pediatric First Aid & CPR/AED class, contact me to schedule. I work by appointment only — reach out by phone or email and include the dates you want, the approximate number of participants, and your preferred location.
The goal is not simply to memorize steps. It is to build the confidence to recognize an emergency, call for help, and begin appropriate care when every second matters.
Educational information in this article is not a substitute for certification or medical advice. In an emergency, call 911 and follow the dispatcher's instructions.
Further Reading
- American Red Cross: Child and Baby CPR
- HSI: Pediatric First Aid | CPR AED
- HSI: CPR, AED, and First Aid Training
Explore Topics
Written by
David Onori
David Onori is a Trained Emergency Medical Responder (EMR) and Red Cross & HSI certified CPR and First Aid instructor serving Temecula, Murrieta, San Diego, and surrounding Southern California communities. He is a member of the Red Cross Ready Rating Business program. Every class is taught onsite — he comes to you.