Hands-Only CPR: A Step-by-Step Guide Anyone Can Follow
· 6 min read · David Onori
Hands-Only CPR: A Step-by-Step Guide Anyone Can Follow
Cardiac emergencies can strike without warning — at home, in the workplace, at a community park, or during a sports event. When someone suddenly collapses and stops breathing normally, every single second counts. For bystanders who may feel intimidated by traditional CPR methods involving rescue breaths, Hands-Only CPR is an empowering, lifesaving technique that virtually anyone can learn and perform.
I believe that lifesaving knowledge should be accessible, straightforward, and stress-free. Whether you are a parent, a teacher, a fitness instructor, or a business owner looking to protect your team across San Diego County, Temecula, Murrieta, Menifee, and Lake Elsinore, knowing what to do in the critical minutes before emergency medical services arrive can make all the difference.
Here is a step-by-step breakdown of Hands-Only CPR so you can feel confident, prepared, and ready to act.
When Should You Use Hands-Only CPR?
Before jumping into the steps, it is essential to understand when this technique applies. Hands-Only CPR is recommended for teens and adults who suddenly collapse and are:
- Unresponsive: They do not wake up or react when you talk to them or tap their shoulder.
- Not breathing normally: They are either not breathing at all or only gasping.
Note: Infants and young children, as well as victims of drowning or drug overdose, typically require traditional CPR that includes rescue breaths. Red Cross and HSI training programs cover these distinctions in detail.
Step 1: Ensure Scene Safety and Check Responsiveness
Your safety is always priority number one. Before rushing to assist someone, take a rapid scan of your surroundings.
- Scan for hazards: Look out for oncoming traffic, downed electrical wires, fire, chemical spills, or aggressive animals. Never rush into an unsafe environment.
- Shout, tap, and shout: Once you confirm the area is safe, kneel beside the person. Tap them firmly on the shoulder and shout loudly, “Are you okay? Can you hear me?”
- Assess breathing: Watch their chest for normal movement. If they are unresponsive and only gasping or not breathing at all, act immediately.
Step 2: Call 911 and Send for an AED
Time is critical during cardiac arrest.
- Call 911 immediately: If you are with someone else, point directly at them and say, “You — call 911 and look for an AED!” If you are alone, pull out your phone, dial 911, and put it on speaker mode.
- Follow dispatcher instructions: The 911 dispatcher is trained to coach you through the emergency, verify your location, and keep you calm while you prepare to start compressions.
- Locate an AED: If an Automated External Defibrillator is nearby — common in offices, gyms, schools, and shopping centers — have a bystander retrieve it right away.
Step 3: Position Yourself and Find Correct Hand Placement
Proper positioning ensures your compressions are deep and effective.
- Firm surface: Make sure the person is lying flat on their back on a firm surface such as the floor or ground. If they are on a soft couch or mattress, carefully slide them onto the floor.
- Kneel close: Kneel beside the person's chest with your knees shoulder-width apart.
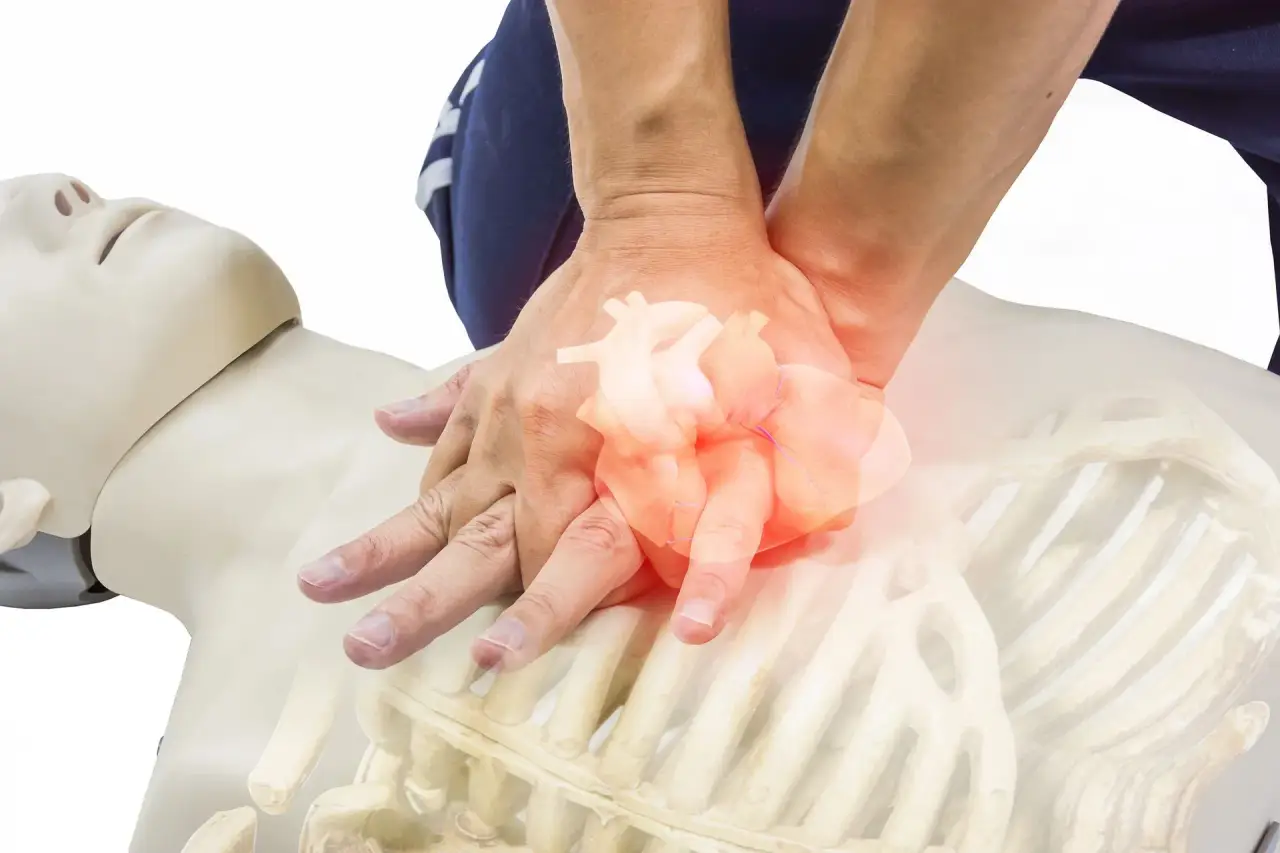
- Hand placement: Place the heel of one hand directly in the center of the chest on the lower half of the breastbone. Place your other hand directly on top.
- Interlace fingers: Interlace your fingers and raise them slightly so they do not press directly onto the ribs, which reduces the risk of injury.
- Lock your elbows: Position your shoulders directly over your hands and keep your arms completely straight. Use your upper body weight — not just your arm strength — to push down.
Step 4: Push Hard and Fast
This is the core action of Hands-Only CPR.
- Push depth: Push straight down at least 2 inches for an average adult.
- Compression rate: Maintain a rhythm of 100 to 120 compressions per minute — roughly two compressions every second.
- Allow full recoil: After each push, lift your weight slightly to let the chest return to its normal position. Do not lean on the chest between compressions, as this prevents the heart from refilling with blood.
- Keeping the right rhythm: Many people find it helpful to push to the beat of a familiar song around 100 to 120 beats per minute. “Stayin' Alive” by the Bee Gees is a classic example that matches this lifesaving rhythm.
Step 5: Continue Until Help or an AED Arrives
Do not stop chest compressions once you start, unless one of the following occurs:
- Signs of life appear: The person starts breathing normally, coughing, or moving.
- An AED arrives: Turn it on immediately and follow its voice prompts, pausing compressions only when the device instructs you to analyze the heart rhythm.
- Emergency responders take over: Paramedics, EMTs, or trained medical personnel arrive and instruct you to stop.
- Physical exhaustion: If another bystander is present, switch off every 2 minutes to maintain high-quality compressions.
Build Real-World Confidence Through Hands-On Training
Reading about CPR is a great first step, but nothing replaces hands-on practice. In a skills class, you build the muscle memory, technique, and confidence needed to actually act in a real emergency — not just know the steps in theory.
I offer flexible, mobile CPR and first aid training for individuals and groups throughout San Diego County, Temecula, Murrieta, Menifee, and Lake Elsinore. Training options include:
- Mobile on-site training: I come directly to your office, school, daycare, fitness center, or home.
- Blended learning: Complete your coursework online at your own pace, then finish with a focused in-person skills session.
- Course options: First Aid & CPR/AED, Pediatric First Aid & CPR/AED, Basic Life Support (BLS), Stop Life-Threatening Bleeding, and certification renewals through Red Cross and HSI programs.
Because all courses are appointment-only, scheduling is simple and personalized. Contact me here and include the specific dates you want for your session.
Take control of your safety readiness today — and let me help you become a confident, capable lifesaver in your community.
Explore Topics
Written by
David Onori
David Onori is a Trained Emergency Medical Responder (EMR) and Red Cross & HSI certified CPR and First Aid instructor serving Temecula, Murrieta, San Diego, and surrounding Southern California communities. He is a member of the Red Cross Ready Rating Business program. Every class is taught onsite — he comes to you.